O1 Tool Steel - 1.2510 - 100MnCrW4 - SAE O1 - JIS ~SKS 3
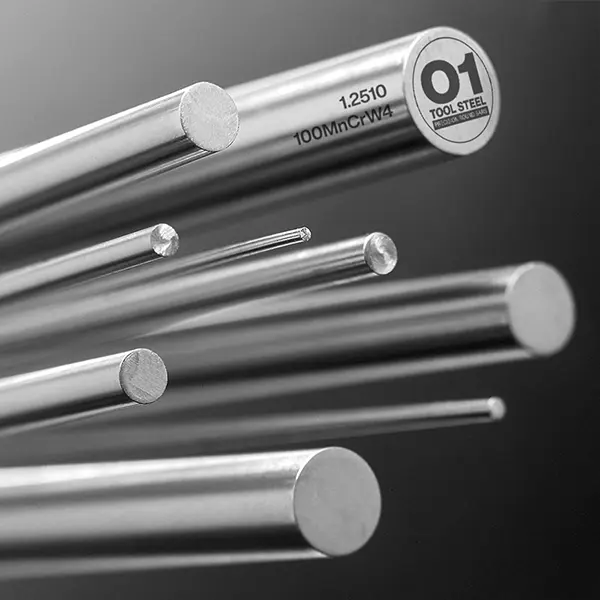
O1 Tool Steel - 1.2510 - 100MnCrW4 - SAE O1 - JIS ~SKS 3
Back to Steel Overview
O1 STEEL PRICE CHART
O1 STANDARD VALUES
C
Si
Mn
P
S
Cr
V
W
100MnCrW4
57 HRC - 62 HRC
max. 229 HB
100MnCrW4
57-62 HRC
max. 229 HB

O1 PHYSICAL PROPERTIES
It is important, when hot working the O1, to stay within the recommended temperature ranges to prevent grain growth. If more time is needed, reheating the material may be necessary.
While cold working the O1, like other steels, it will work harden, meaning it can deform and become harder and less ductile leading to a risk of cracking.
When finished cold working the material it has to be stress relieved as it may contain residual stresses.
O1 TECHNICAL PROPERTIES
Due to its combination of hardness, toughness and ease of heat treatment, the O1 is popular as a knife steel. As the O1 can achieve a high hardness when heat treated it gives the steel a good edge retention but in return is not as easy to sharpen.
As the O1 is not a stainless steel it has to be properly maintained to prevent rusting.
Typically the density of tool steel O1 is 0.283 lb/in3 (7.83g/cm3) at room temperature.
The yield strength shows how much stress can be applied before a material plastically deforms. Beyond that point the material will not return to its original form if the stresses are taken away but will stay deformed or even break.
The range for the O1 tool steel is between 56.6 - 74 KSI (390 - 510 MPa).
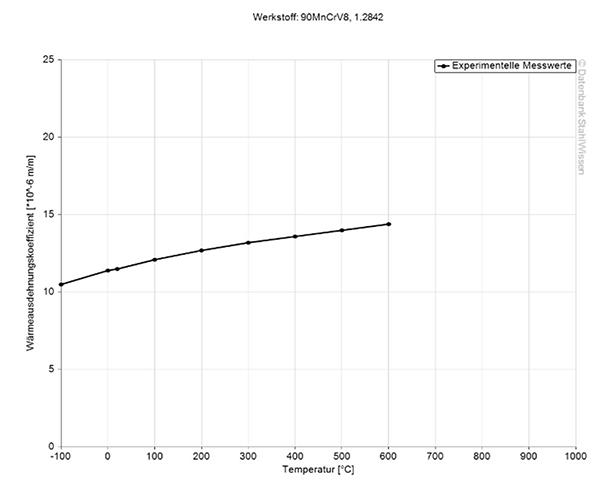
The heat conductivity for tool steel is at 33.0 W/(m*K) (229 BTU/(h-ft*°F)) at room temperature.
Heat conductivity table | |
Value | By temperature |
33.0 | 68°F |
32.0 | 662°F |
31.3 | 1292°F |
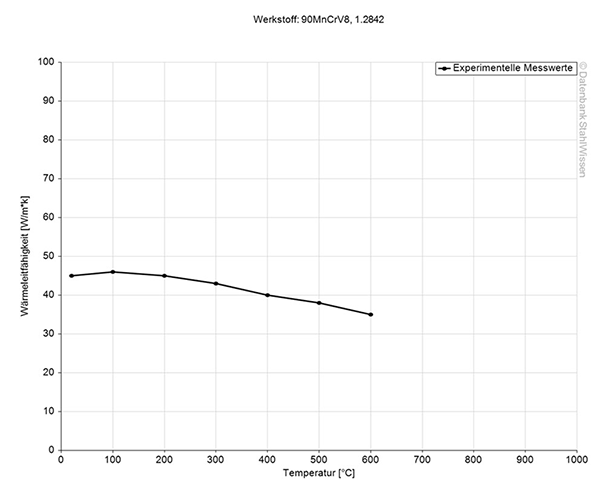
This diagram shows how much the O1 tool steel might expand or contract when the temperatures change which can be very important when working with high temperatures or strong temperature changes.
Medium thermal expansion coefficient | |
10-6m/(m • K) | At a temperature of |
12.2 | 68 - 212°F |
13.2 | 68 - 392°F |
13.8 | 68 - 572°F |
14.3 | 68 - 752°F |
14.7 | 68 - 932°F |
15.0 | 68 - 1112°F |
15.3 | 68 - 1292°F |
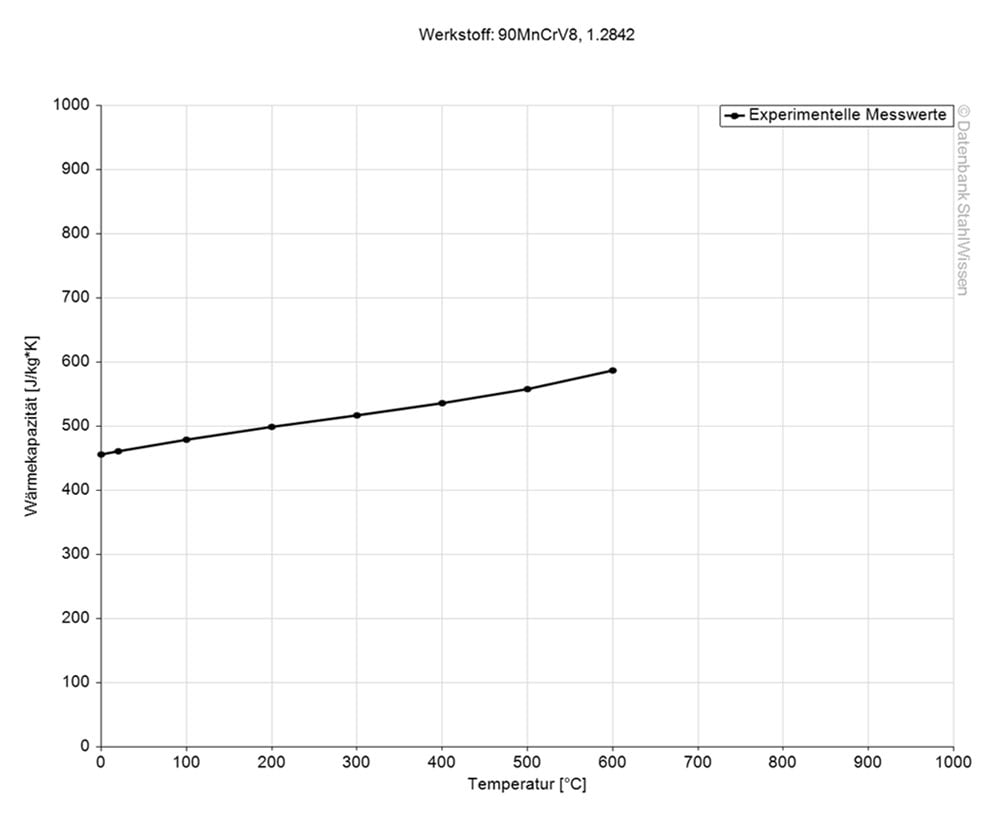
The following table shows the electrical resistivity of tool steel O1.
Table of the specific electrical resistivity | |
Value | At a temperature of |
0.35 (Ohm*mm²)/m | 68°F |

PRECISION ROUND STEEL WITH MACHINING ALLOWANCE – PEELED / ROUGH TURNED!

O1 PROCEDURE
Normalizing is done to give the material a more uniform microstructure, refine the grain structure, relieve stress after machining, it can improve mechanical properties and can be done as a preparation for further heat treatments.
When normalizing the O1, heat the material uniformly, over the critical temperature and hold for a short time. Then cool the material naturally down in still air.
Heat the workpiece through to 1200°F (650°C) after rough machining and hold for 2 hours. Cool slowly to 930°F (500°C), then it can be freely cooled further in air.
Stress relieving can be done after intensive machining but also after grinding, welding, forging or cold working the O1 tool steel.
Machining can proceed or hardening and tempering can commence when stress relieving is used as a preparation.
Stress relieving can improve the stability and performance but can also result in some dimensional changes, for more information please see section “Dimensional Changes”.
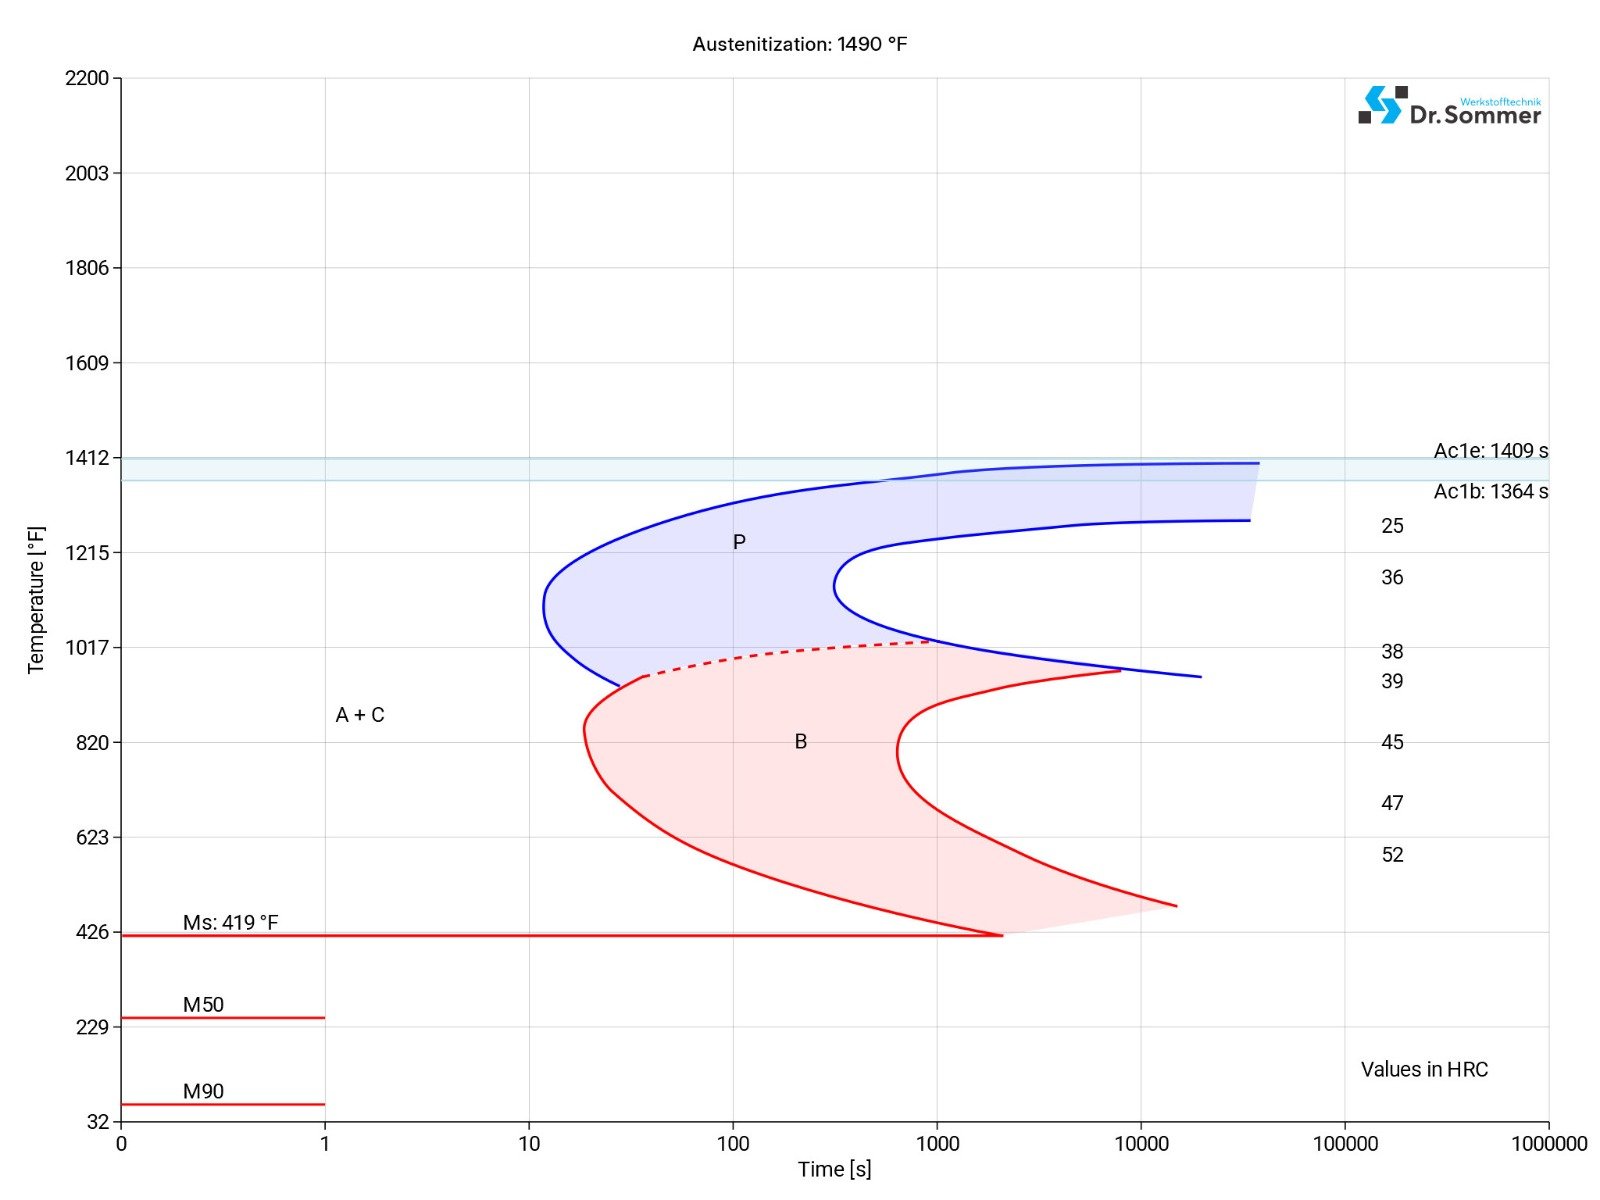
The material should be protected against decarburization and oxidation during hardening.
Preheating temperature: 1110 - 1290°F (600 - 700°C)
Austenitizing temperature: 1450 - 1560°F (790 - 850°C)
Soak the material for approx. 20 - 30 mins. per 1 inch (25.4 mm) of thickness and the quench it.
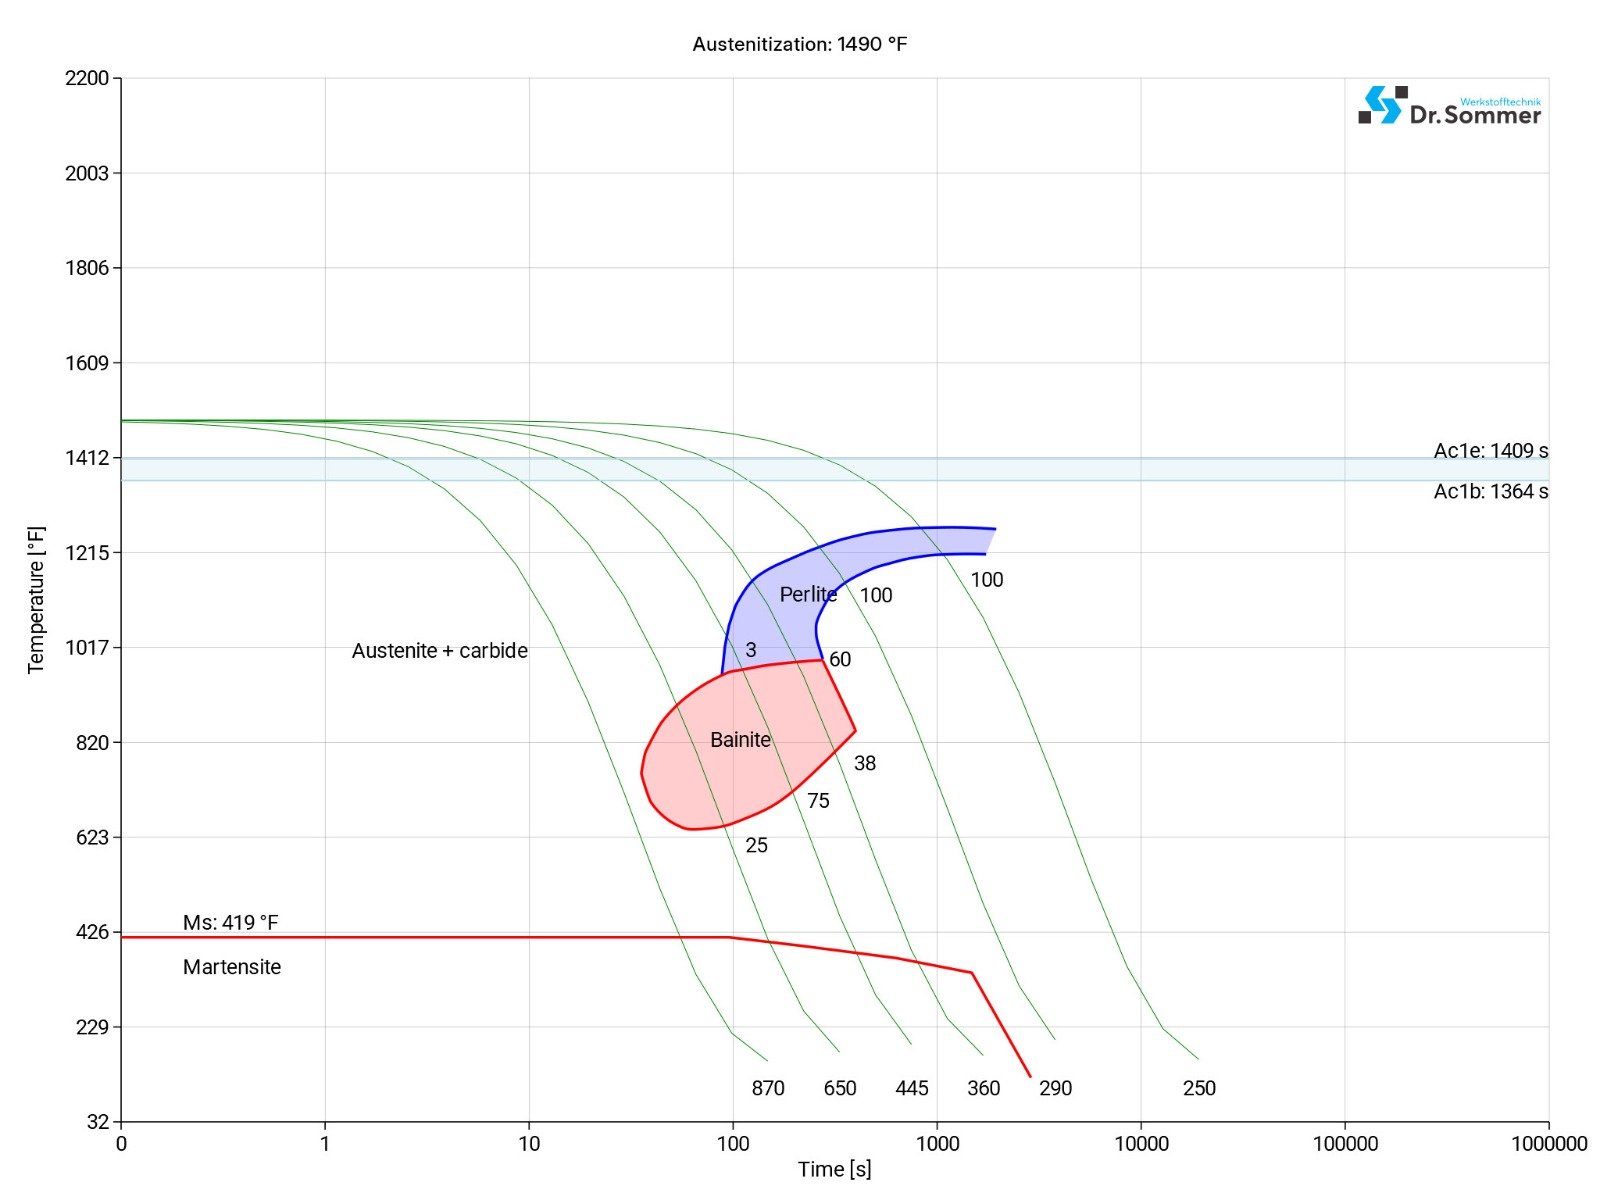
• Martempering bath at 360 - 435°F (180 - 225°C)
O1 is quenched in warm oil to a temperature of 125 - 150°F (49 - 66°C), and tempered immediately. Cooling should be done uniformly and at a sufficient rate to avoid transformation of the parts, however, excessive distortion and/or quench cracking must be considered.
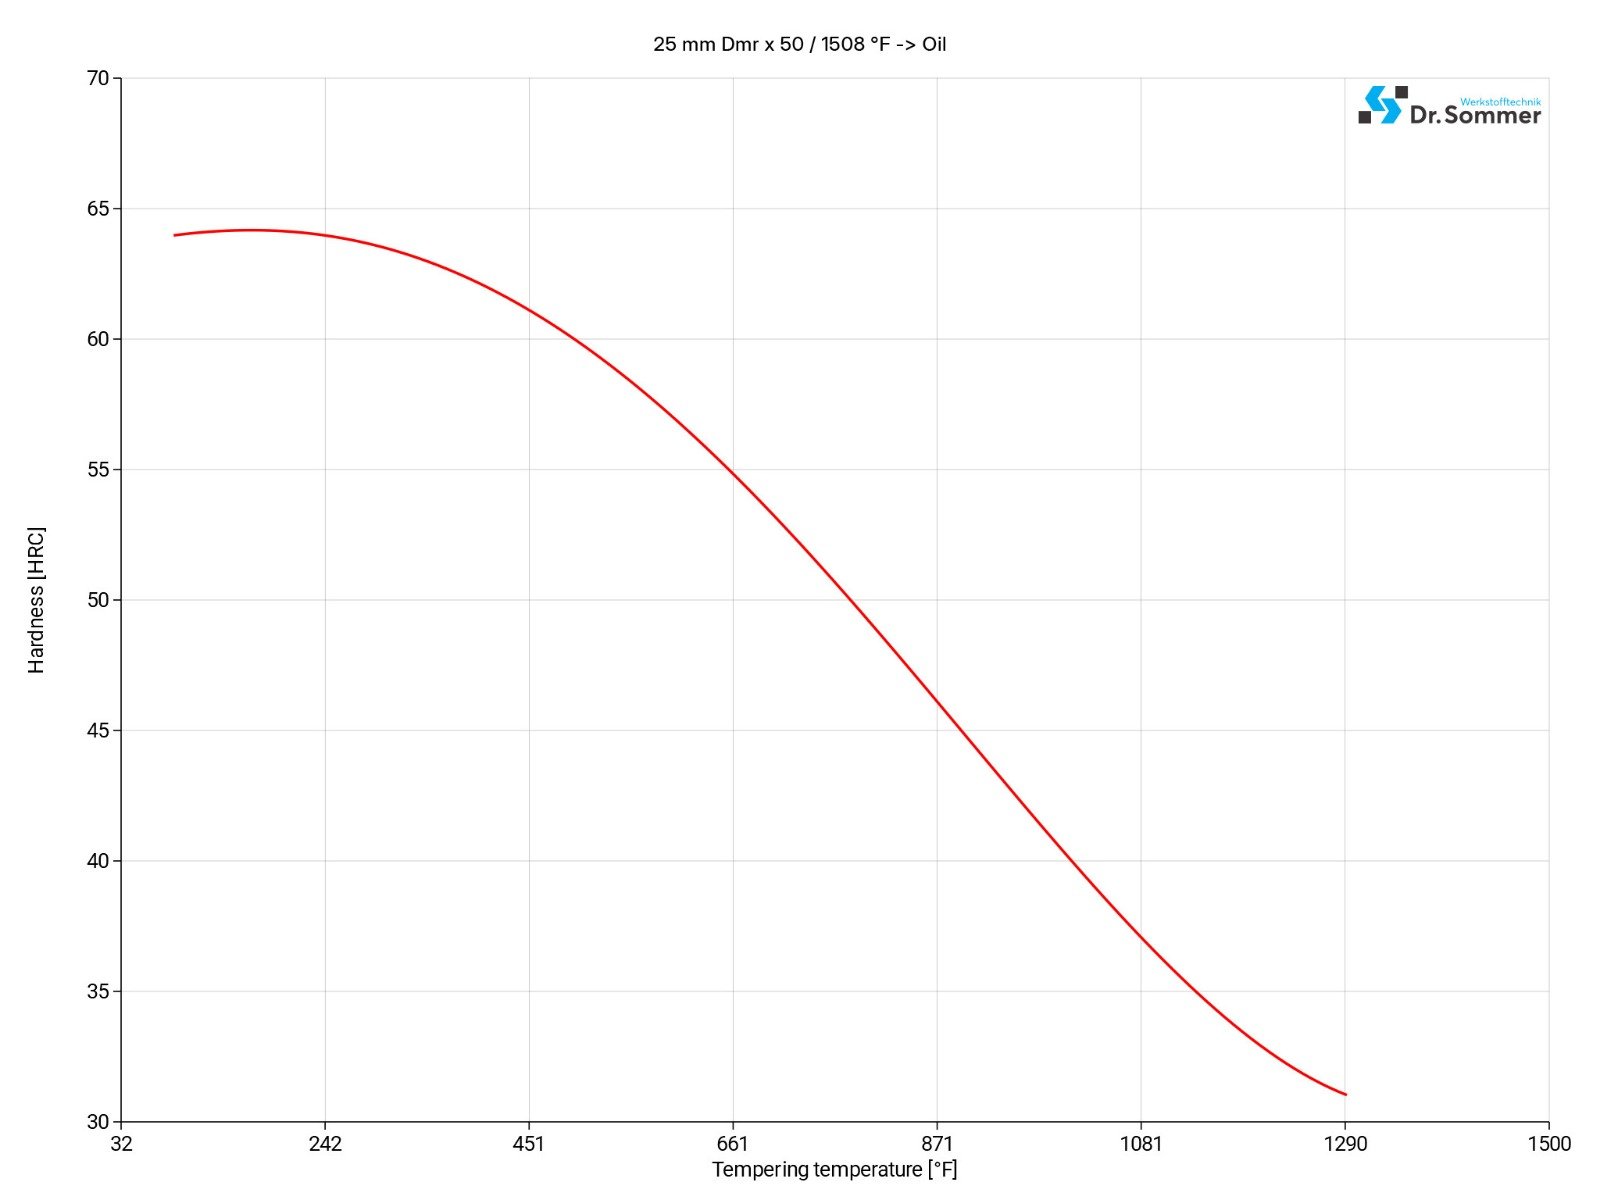
Tools at austenitizing temperature are immersed in the martempering bath and then air cooled to no lower than 210°F (100°C). Immediately temper as with oil-quenching.
Immediately after quenching, the work piece should be sub-zero treated to between -95 to -110°F (-70 to -80°C), soaking them for 3 - 4 hours following tempering.
Sub-zero treatment will increase the hardness by 154 - 160 BHN (1 - 3 HRC). Due to cracking, it is not advised to use this treatment for intricate shapes.
In general the sub-zero treatment transfers retained austenite back to martensite to refine the carbide structure and dimensional stability.
Rapid warming or cooling may reintroduce stresses that may lead to cracking.
While the sub-zero treatment has many advantages, sub-zero treatment can reach a point where it turns advantages to disadvantages and the material can lose its stability or even over harden.
O1 SURFACE TREATMENT
By introducing carbon into the surface of the O1 it builds a hard carbide layer to increase the surface hardness and wear resistance.
This process introduces both nitrogen and carbide into the surface layer to improve the surface hardness, wear resistance as well as the resistance to softening at high temperatures.
Black oxide coating can give some additional corrosion resistance but is most often used to enhance the aesthetics of the parts by giving the surface a black-blue surface coloring that will reduce light reflecting off the surface.
Both processes, Physical Vapor Deposition (PVD) and Chemical Vapor Deposition (CVD), bring a thin coating on the surface of the material. This thin hard layer gives the material a wear resistant coat.
O1 PROCESSING
The O1 tool steel has a fine grained structure and balanced composition which makes it relatively well to machine.
It is preferred to machine this material grade in its annealed condition when a lot of material needs to be removed as it is more challenging to machine the O1 in its hardened condition. To work this high carbon material in its hardened condition more wear resistant tools, like carbide tools, should be used as well as coolant or lubricants can help to reduce heat and prolong tool life.
Tool wear should be monitored regularly to make sure to prolong tool life and to ensure precise machining. Coolant and lubricant are used as mentioned before to reduce heat as this material can work harden when being machined.
O1 tool steel can be EDMed in its annealed condition but also in its hardened condition. EDM can introduce some heat affected zones which alters the properties in those zones compared to the rest of the material, to restore the unity of properties throughout the material or relieve introduced stresses or refine the microstructure the O1 can be tempered.
The recast layer can completely be removed by stoning and polishing.
Dimensional changes during hardening and tempering should not exceed 0.25% per side if the recommended stress relieving is done. Potential changes should be considered when tight tolerances are required for the finished product.
Overheating the material should be avoided, as it will display shrinkage after being tempered. If hardening is done correctly the workpiece will expand slightly and return very close to its original size after being tempered.
Forging O1 refines the grain structure of the material, which in turn improves mechanical properties like toughness and fatigue strength. As well, forging can result in a more uniform and homogeneous material which can enhance the overall properties.
Heat the material to a temperature range of 1796 - 1832°F (980 - 1000°C) and forge. Do not let the temperature drop below 1472°F (800°C), stop forging and heat the material up again if needed. After, cool the material slowly and at a controlled rate, preferably in the furnace or in lime or dry ashes.
O1 APPLICATION OPTIONS
Alloyed oil hardener with focus on cold work; can be used for a wide range of applications: full hardenability, high degree of dimensional stability, good cutting power and good toughness.
• Blanking and stamping tools up to 0.2362" (6 mm) thickness
• Shear knives
• Threading tools
• Thread dies
• Reamers
• Chasers
• Measuring tools
• Plastic molds
• Rubber molds
• Calibres
• Guide rails
• Dies
• Punches
• Woodworking tools
• Machine knives
O1 CONCLUSION
- Universally applicable
- Medium alloyed oil hardener
- High hardness acceptance
- High dimensional stability
- Good edge retention
- Good toughness
- Forgeable
- Weldable
- Magnetizable
- Also popular as a knife steel due to its combination of good properties
We offer this steel as O1 Precision Ground Flat Stock, O1 Round Bars Decarb Free, O1 Drill Rods and Metric O1 Pre-Hardened Flat Stock.
O1 ALTERNATIVES
Are you looking for an alternative steel grade?
WE HAVE THE SOLUTION!
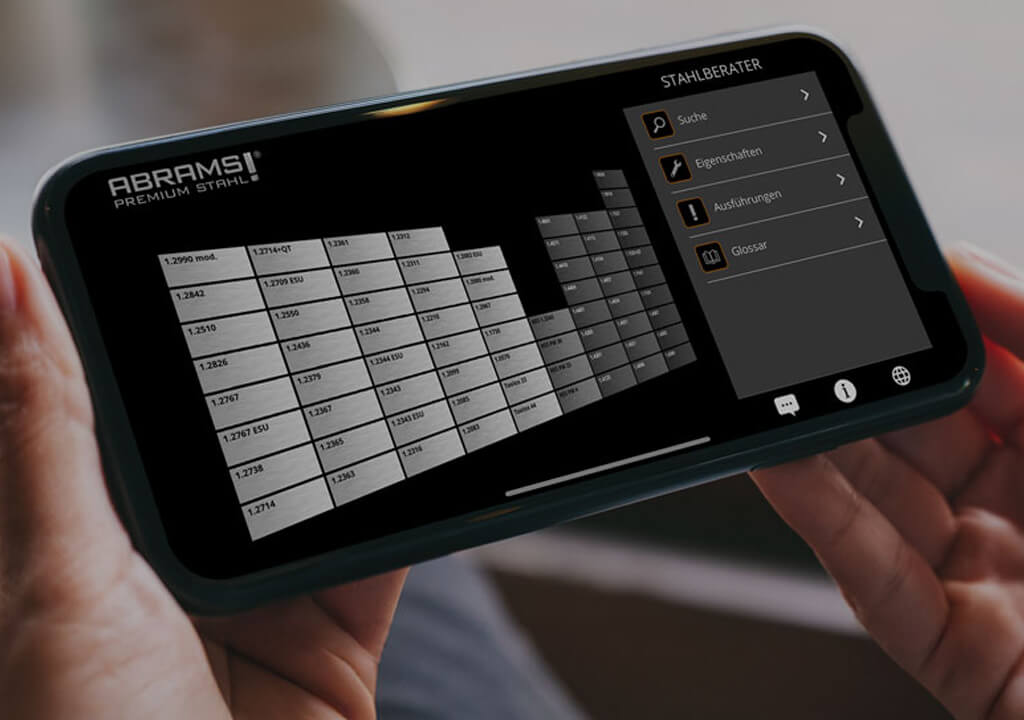
With the ABRAMS STEEL GUIDE, you can obtain an alternative or equivalent steel grade with just a few clicks.
O1 DATASHEET
Download the technical data sheet in PDF format here.

The data shown here has been compiled with the greatest diligence and is regularly updated with regard to the correctness and completeness of its content. The content is indicative only and should not be taken as a warranty of specific properties of the product described or a warranty of suitability for a particular purpose. All information presented is given in good faith and no liability will be accepted for actions taken by third parties in reliance on this information. ABRAMS Industries reserves the right to change or amend the information given here in full or parts without prior notice.

